Click here to return to FULL Migration Document Package (for migrating program and database to new server)
Click here to return to FULL Install Document Package (for new client program installations only)
This document will go over the process of making an RFMS practice database. This process also gives the company a way to test SQL backups to make sure they are working as intended, and this also gives the company a safer way to test updates as this will be completely separated from their active database and active RFMS folder once completed.
This process should be done with everyone out of RFMS.
Our Best Practices document details how to test both the integrity of a backup and the compatibility of an update with the company’s environment. Please contact RFMS by submitting a ticket to help@rfms.com if you do not have this document as it also contains crucial information for making sure the data on your server is as secure as possible.

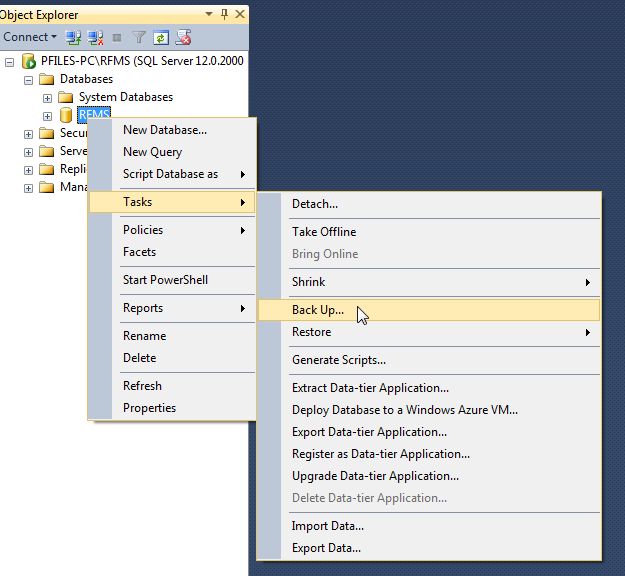
First, log into the SQL Management Studio at the server and make a backup, like so:
At the backup screen, remove the default location and pick a place that will be easy to find. While it is convenient if it lets one save to the C root, often times an access denied error can occur, so it is best to save it somewhere else. In this example, it has been saved to an external drive.
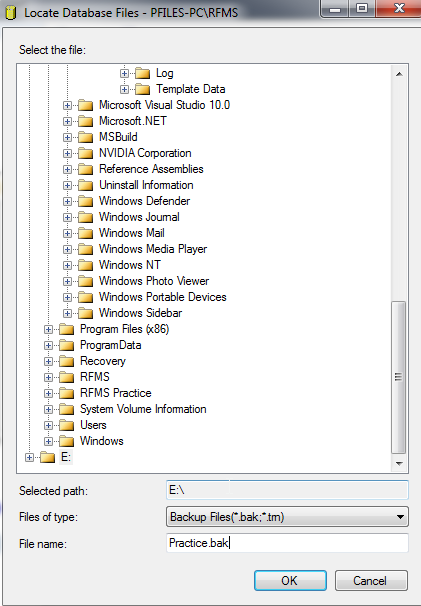
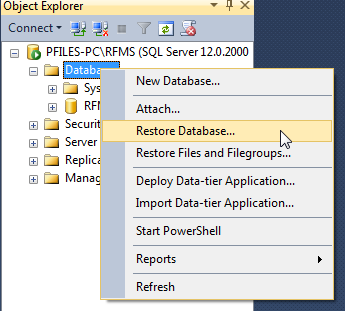
Click OK, execute the backup on the original window, then right click “Databases” in the object explorer and go to Restore Database.
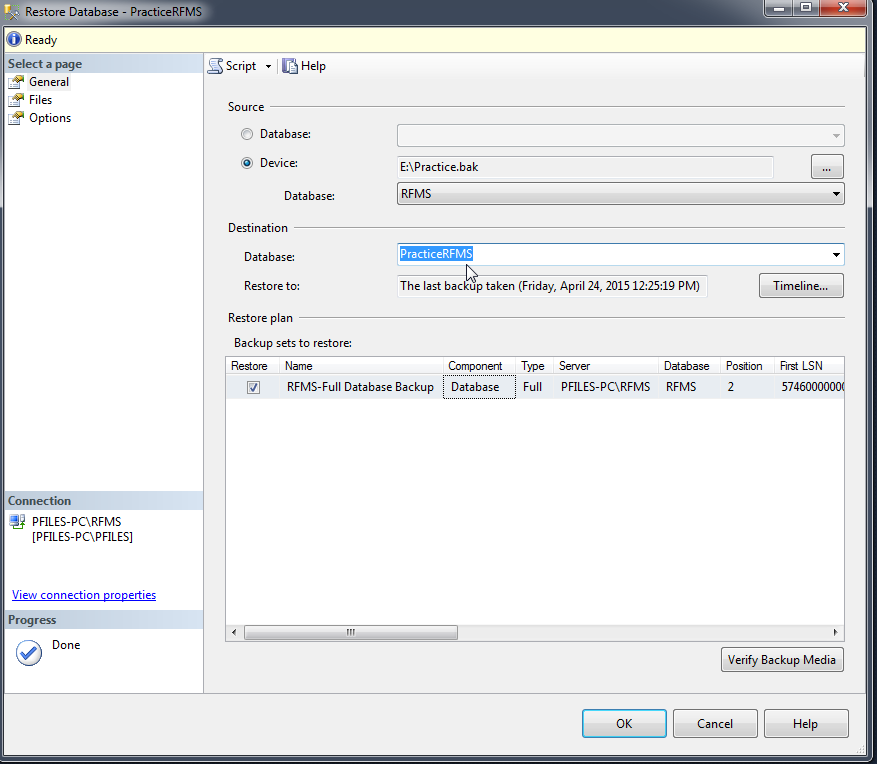
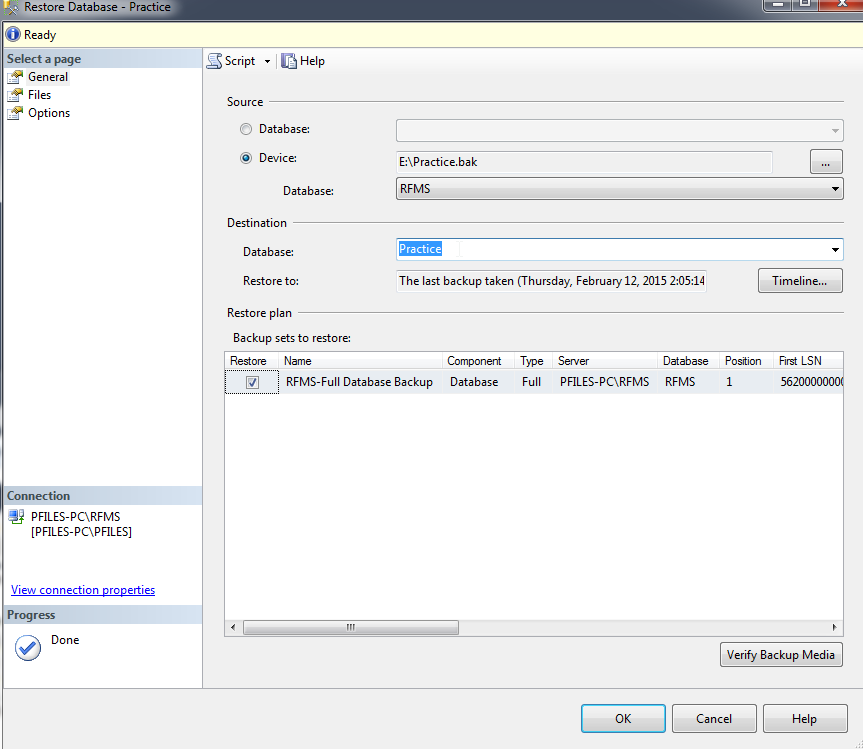
By default, this restoration process tries to overwrite an existing database, so please be sure to change the Destination field first (in the first window) and then double check it when the restore has been configured before clicking OK.
In this next screenshot, the Practice.bak from the external drive has been selected, with the destination named to just “Practice” + the name of your active database with no spaces. (In the below example, my active database is named RFMS, so the practice database is called PracticeRFMS) As is, it would trigger an error, since this is a database that does not yet exist. The General, Files, and Options tabs all need to be configured correctly in order to create a new backup with this method.
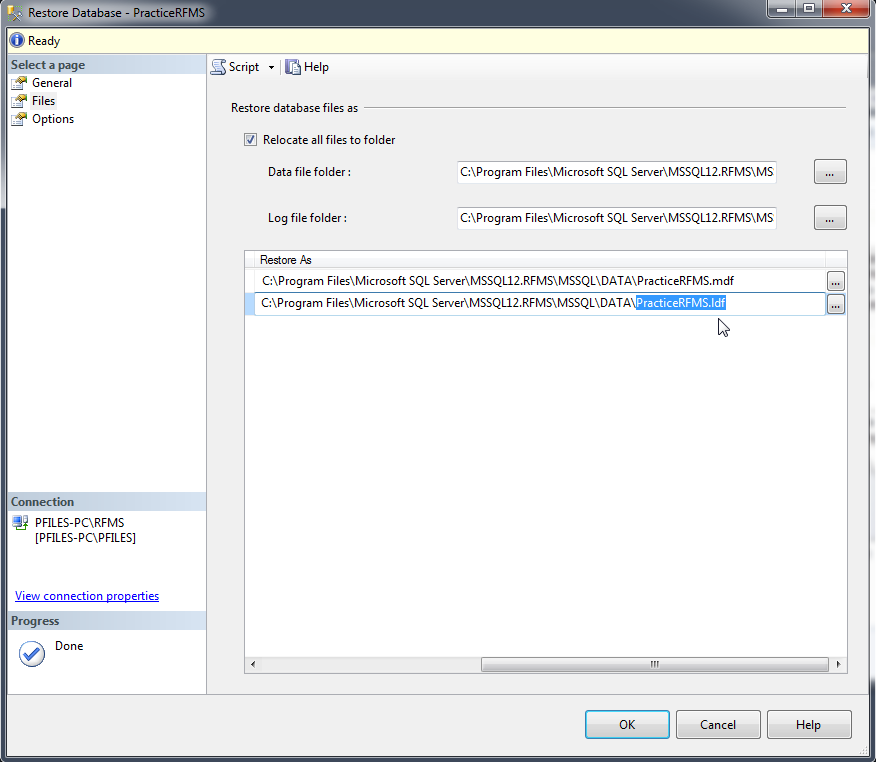
Next go to the Files tab and name these files. First, check the box that says “Reallocate all files to folder”.
Expanding the columns works just like Microsoft excel – scroll to the end of the column, click and drag the end of the column out to expand it. (This isn’t necessary, but makes it easier to edit)
Then, name the files the same as the destination so that it will be easy to find in case it is needed later. In this example, both the mdf and ldf are just “PracticeRFMS” so it would be PracticeRFMS.MDF and PracticeRFMS.LDF.
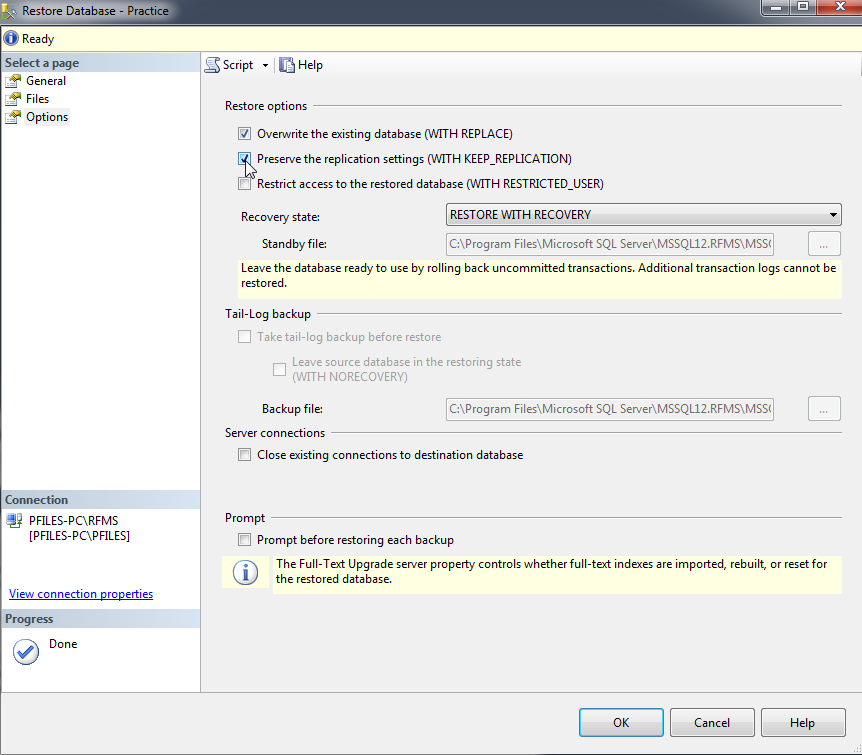
Once this has been done, just check the boxes on the next screen that say “Overwrite the existing database (WITH_REPLACE)” and “Preserve the replication settings (WITH KEEP_REPLICATION)” and go back to the first screen to double check the destination.
If General, Files, and Options have been configured correctly to this point, click OK – there should now be a practice database showing up in the object explorer.
Next, make a new folder and point it to the new practice database. To do this, copy the active RFMS folder, paste it next to the RFMS folder, and name the copy “RFMS Practice”.
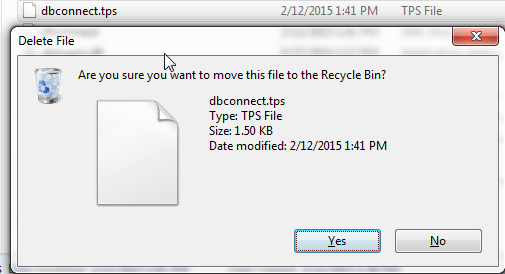
When this has been done, go into the folder and find the files named “dbconnect.tps” and "dbconnect.xml" (if present) then delete them from the folder (The files can also be renamed if the company wants to archive the files, as they will no longer be visible to the RFMS program once renamed.)
After this has been done, run rfmsnav.exe.

It will prompt for server credentials – type them in in the format of “Server\instance” and then the database name.
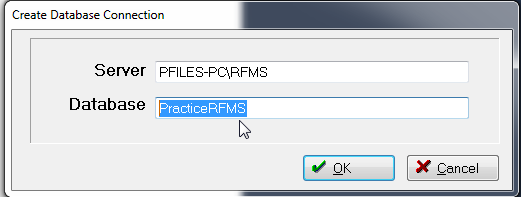
There should now be a usable practice company – to connect workstations to it, use a mapped drive for the RFMS practice folder or use UNC to create shortcuts to rfmsnav.exe and relevant add-ons.
Comments
Article is closed for comments.