Accu-Cut – Main Screen
If you are using an Accu-Cut Cutting Machine and have integrated that specific cutting Machine with RFMS, the following screen will display.
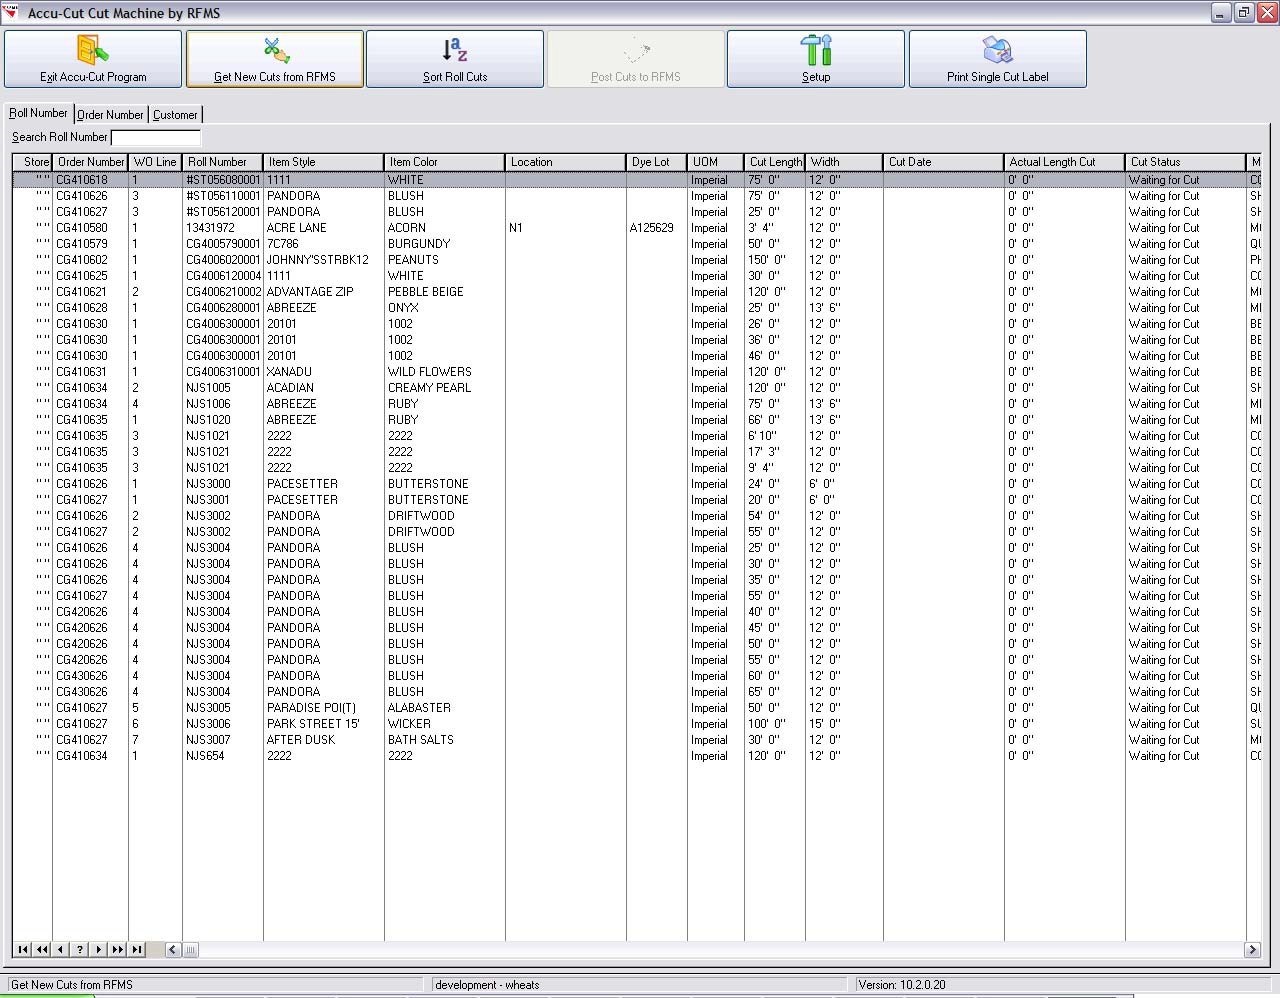
Get New Cuts from RFMS

This button allows you to retrieve the CUTS.TXT file that is created when you create Work Orders and print a Picking Ticket in RFMS.
Sort Roll Cuts
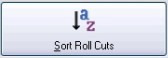
This button allows you to sort the cut order and send the cuts to the cutting machine. See the following screen.
You will generally want to send the larger cuts to the cutting machine first. This screen allows you to select the appropriate cuts and move them up or down using the Move Up and Move Down buttons. You may also delete cuts from this screen by clicking the Remove Cuts button. Once you are satisfied with the order of your cuts, click the Send Cuts button. This will send the cuts to the cutting machine. To exit this screen, click Save Cuts.
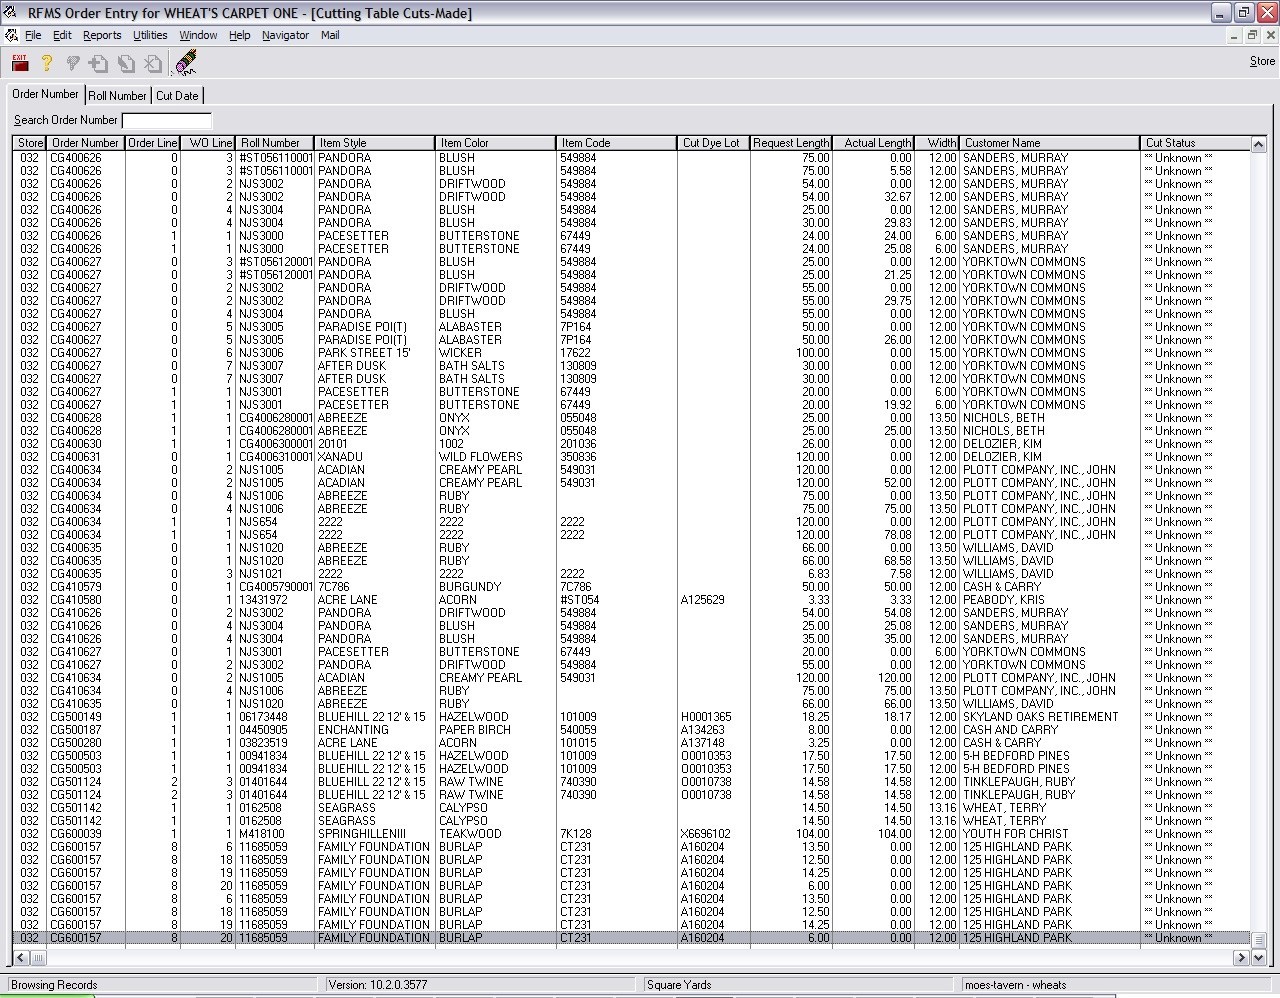
Post Cuts to RFMS
Once the cuts are made, a CUTSMADE.TXT file is created. If you click the Post Cuts to RFMS, this will send the CUTSMADE.TXT file over to RFMS. You can access this information by clicking File, Cutting Table.
Setup
This button allows you to setup parameters for your cutting machine to integrate with the RFMS Cut Machine Integration Software.
Print Single Cut Labels
This button allows you to print cut labels for the cuts you have made. If you have selected the option to preview the tag (in parameters) you will see a screen similar to the following.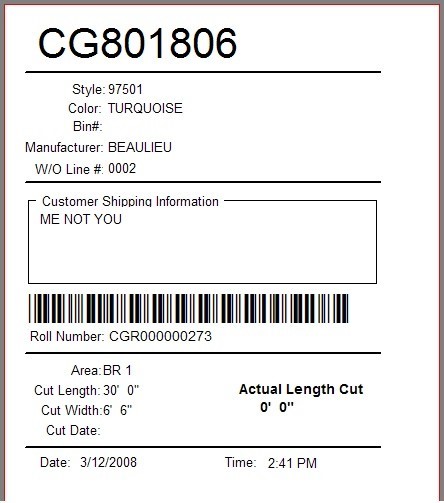
EZ Cut – Main Screen
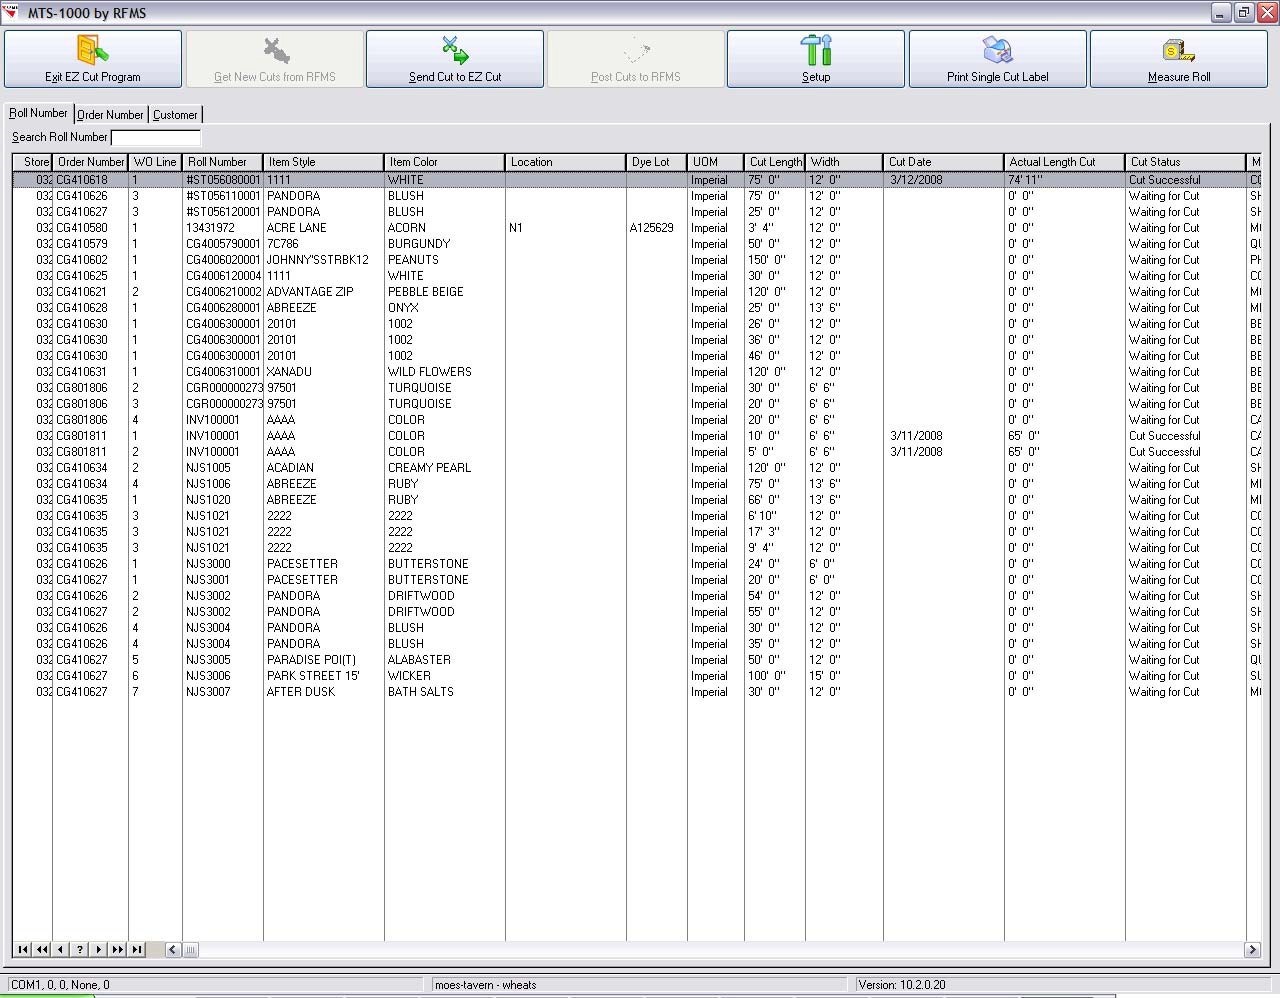
Get New Cuts from RFMS
This button allows you to retrieve the CUTS.TXT file that is created when you create Work Orders and print a Picking Ticket in RFMS.
Send Cut to EZ Cut
Clicking this button will send the highlighted cut to the EZ Cut cutting machine. Once you click this button, the following screen will display.
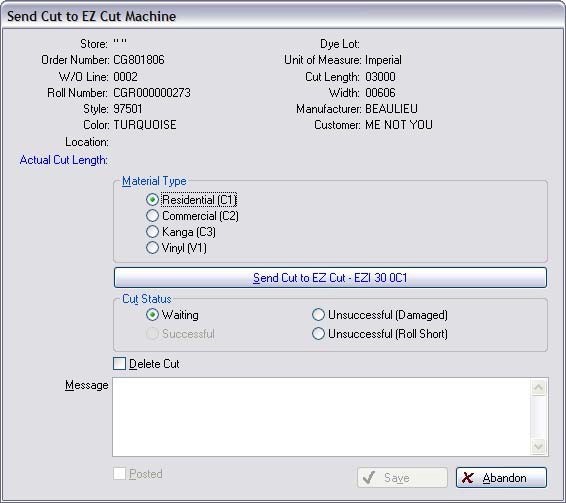
- Select the appropriate Material Type and enter any message necessary into the Message box.
- Click the Send Cut to EZ Cut
- If the cut is successful, the Successful status will be selected. If not, a status of Unsuccessful Damaged or Unsuccessful Roll Short will be assigned to the
- If you wish to Delete the cut, you can do so from the screen by clicking the Delete Cut button and selecting Save. Do this before you send the cut to the cutting
Post Cuts to RFMS
Once the cuts are made, a CUTSMADE.TXT file is created. If you click the Post Cuts to RFMS, this will send the CUTSMADE.TXT file over to RFMS. You can access this information by clicking File, Cutting Table.

Print Single Cut Labels
This button allows you to print cut labels for the cuts you have made. If you have selected the option to preview the tag (in parameters) you will see a screen similar to the following.

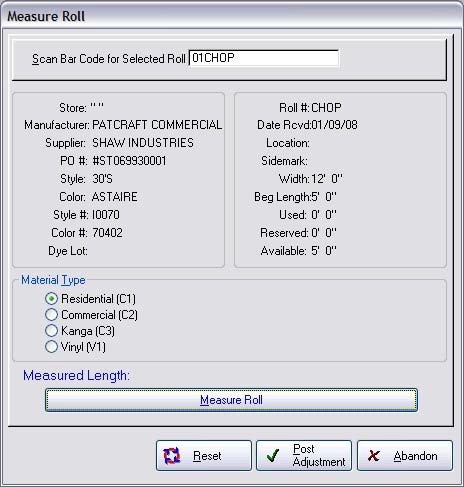
Measure Roll
This feature allows you to measure a roll in your warehouse against the roll information in your inventory file (in RFMS). Scan the barcode for the roll and the roll information will display. If there is a difference between the warehouse measurement and the information in your inventory record, click the Measure Roll button and enter the appropriate information.
For instance, if you have a 50’ roll of Beautiful Creamy Beige in the warehouse, but your inventory record says that you have 65’, you can enter the appropriate measurement and make the adjustment. Once you have done so, click the Post Adjustment button and the roll will be adjusted on the inventory record.
Comments
Article is closed for comments.