Order Entry>File>Customer Orders>Post a Payment Button 
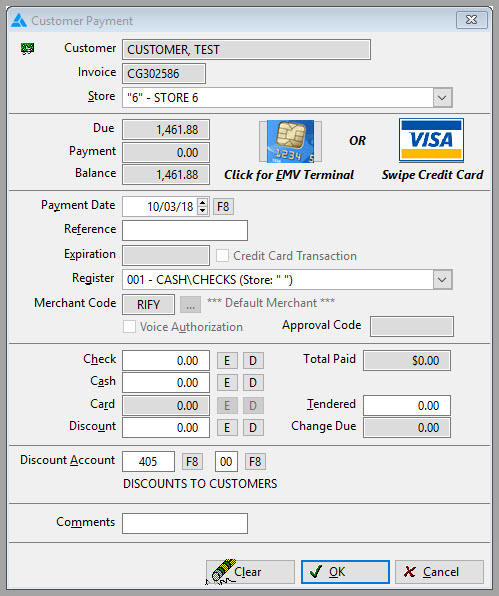
This screen allows the entry of a payment to a customer order. Payments may be made at the end of the entry of the customer order or later from the Customer Orders List screen.
For steps on how to post payment without the physical card present please see the article Card Not Present
How To: |
|
|---|---|
| 1. Go to Order Entry>File>Customer Orders>Post a Payment Button |
|
|
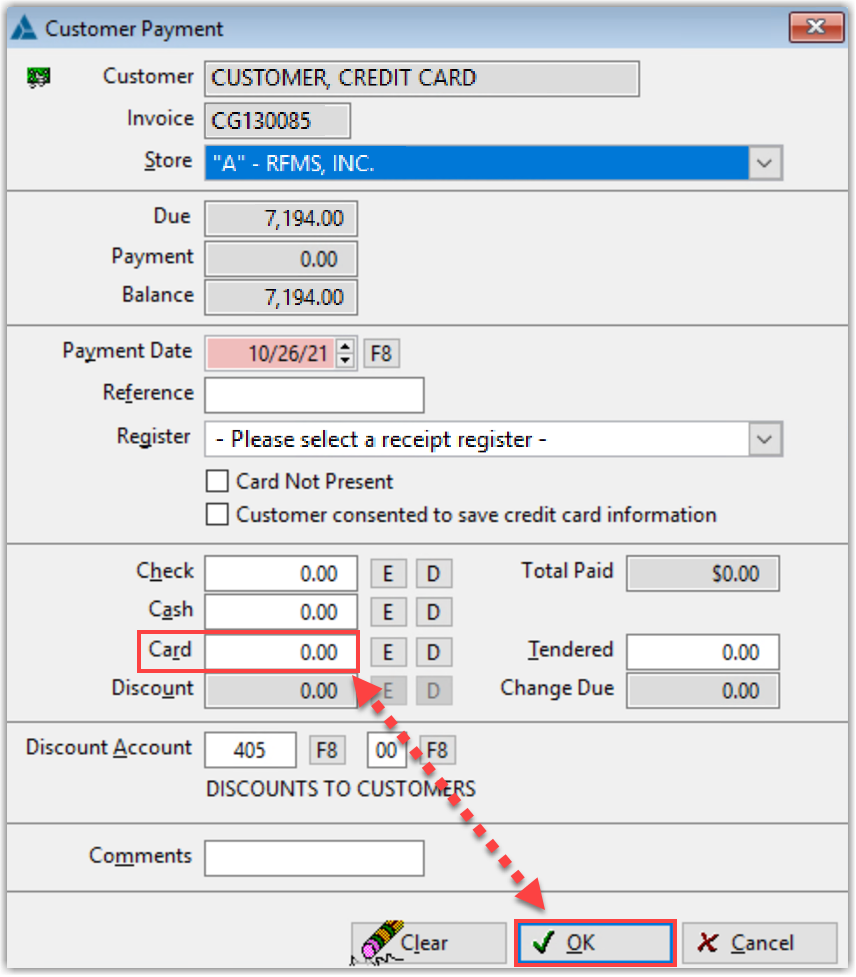
2. Enter the amount in the box labeled Card and select OK Tip: Skip the register select option If the customer has consented to saving card information check the box and see the article Saving Credit Card Information |
 |
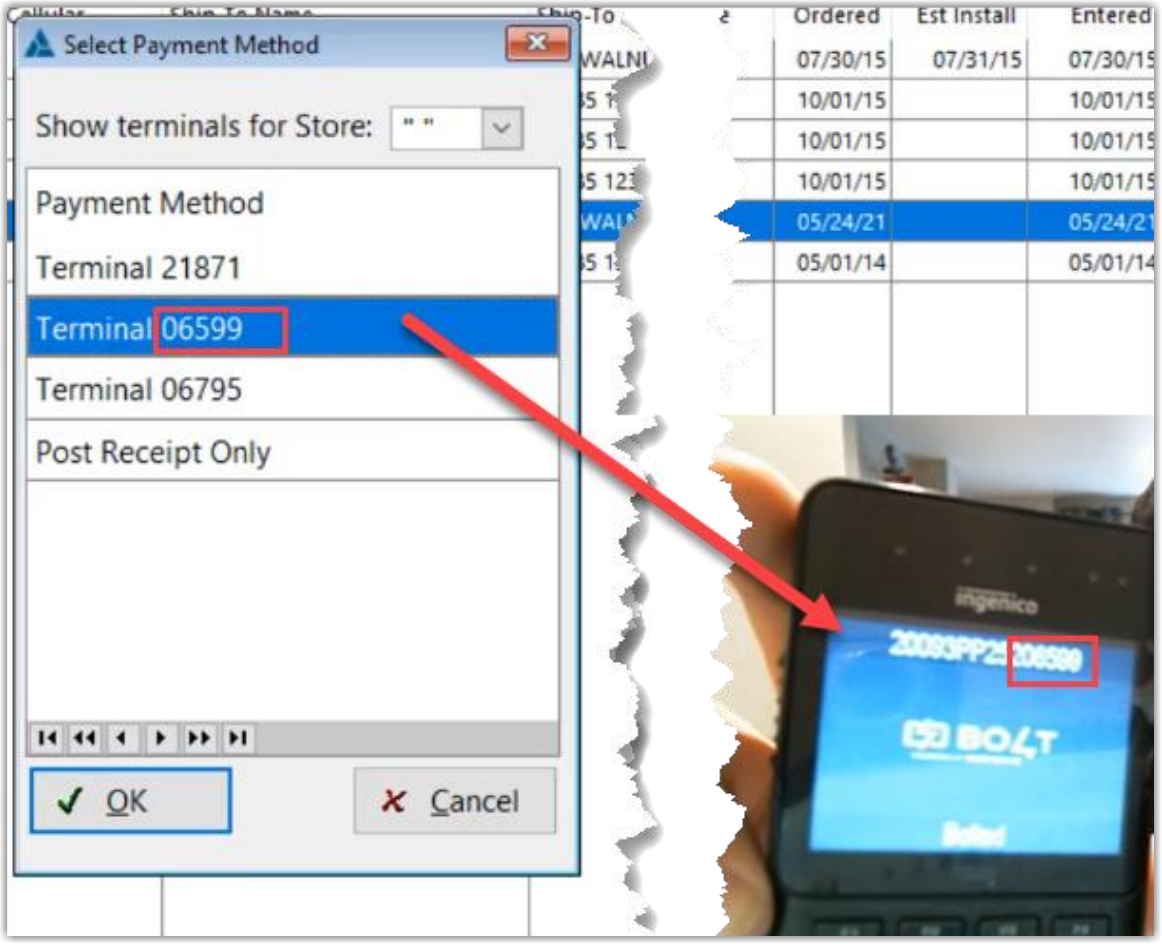
| 3. Select the terminal to use from the box that comes up and click OK |
Tip: The last 4 digits of the terminal are shown on the select screen
|
| 4. Enter the Billing Postal Code. This can be skipped by leaving the information blank and selecting OK |  |
| 5. Scan or tap the card using the terminal or to cancel the transaction, press the red X twice on the terminal. | |
|
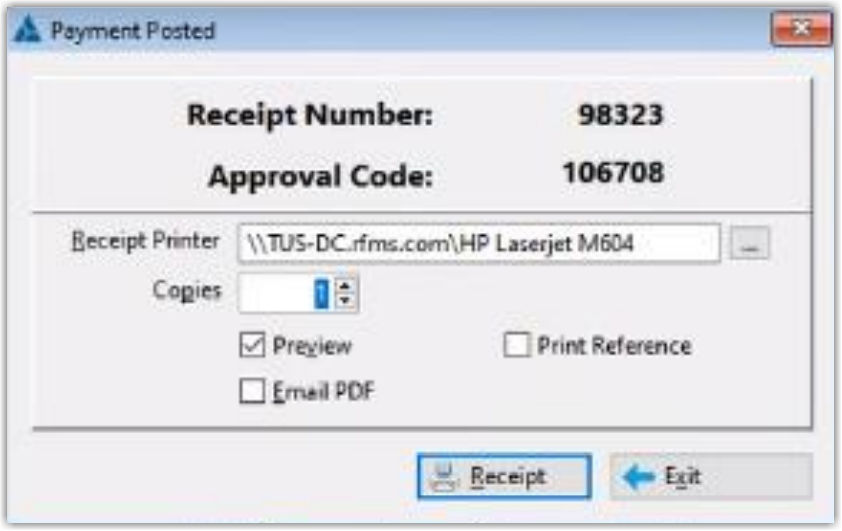
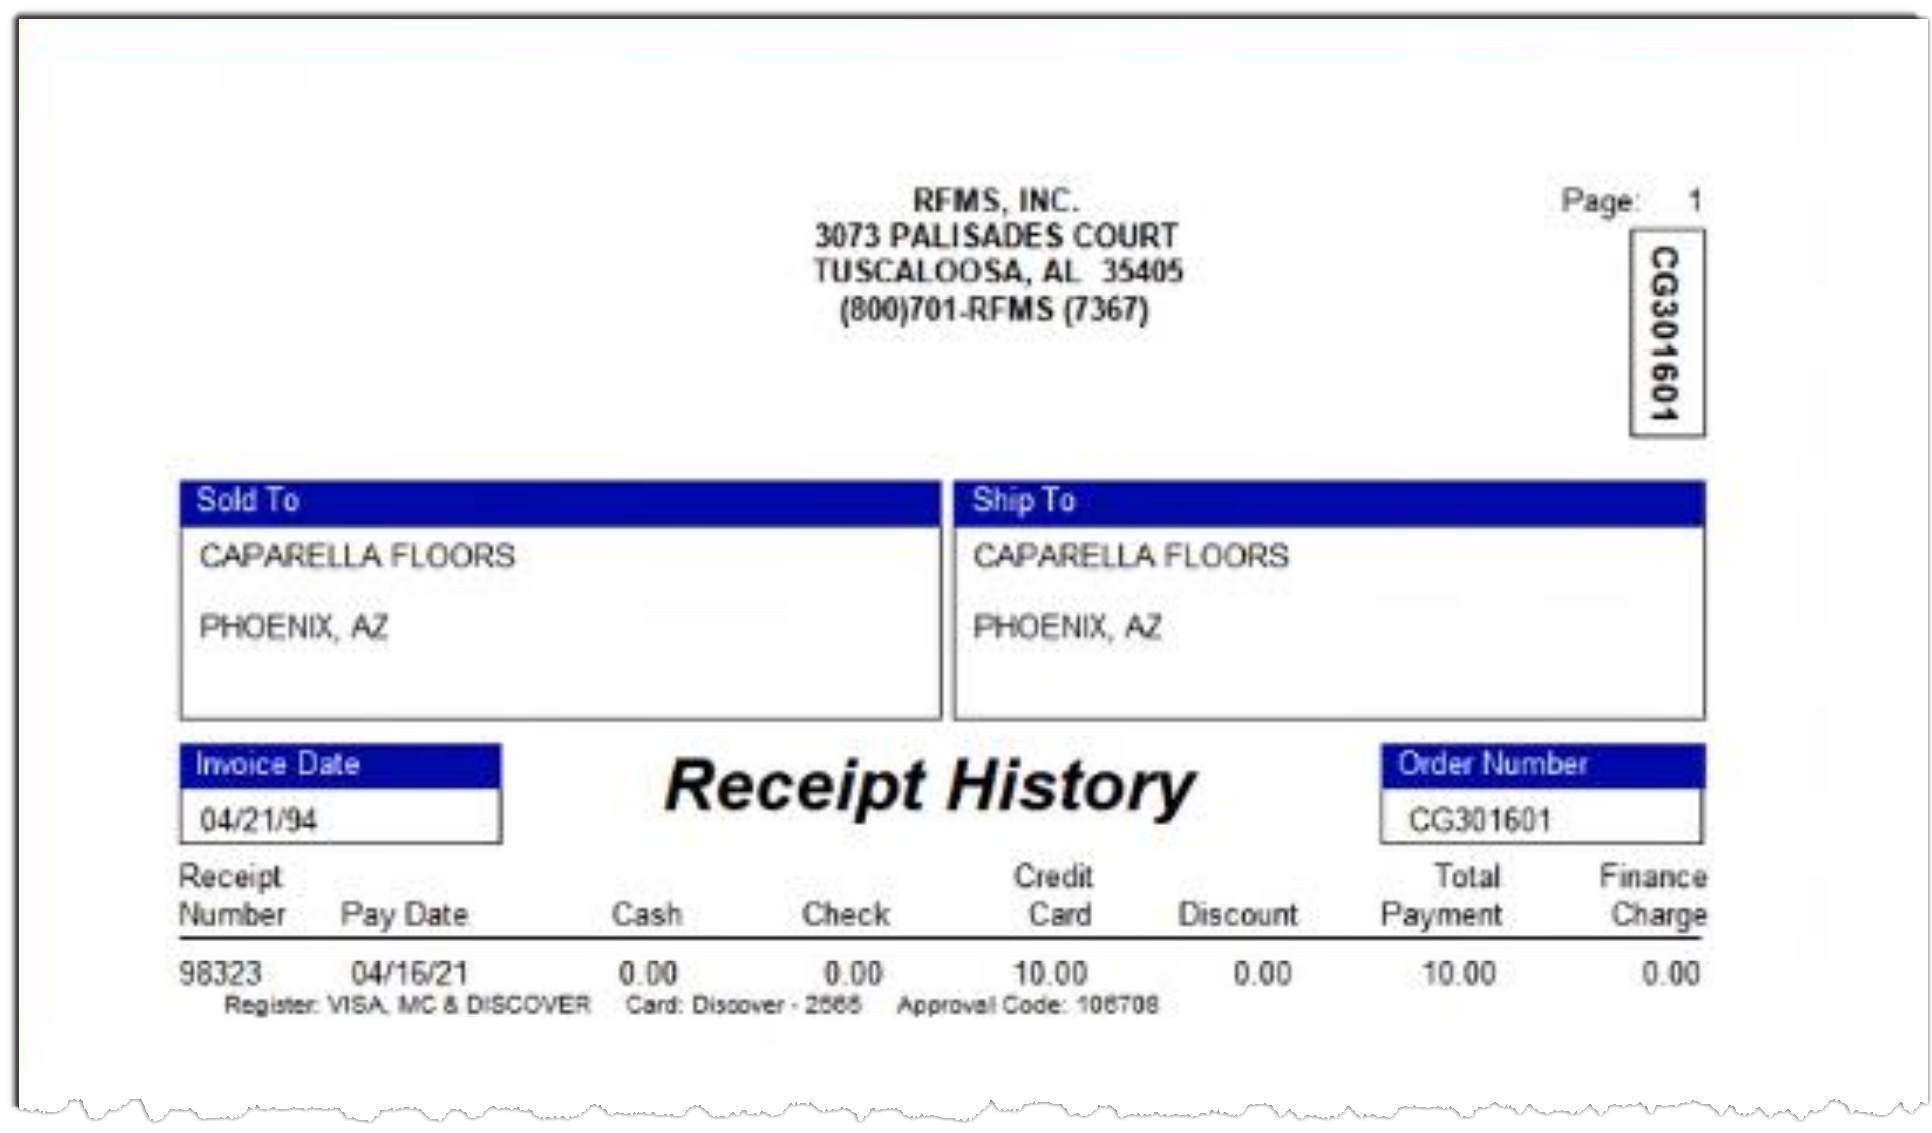
6. Payment is then posted and receipt info is displayed including the approval code. |
|
Video Tutorial
Other Processors
Customer
The customer Sold To name from the order.
Invoice
The customer order invoice number.
Store
Displays the store information from the customer order.
Use the drop-down arrow to choose a different store.
Due
Displays the amount owed for this order before this payment is applied.
Payment
The total of the payment amount while on the payment screen.
Balance
The running balance of the order while on the payment screen.
Payment Date
This field defaults to the system date. Press F8 to access the on-line calendar to change.
Reference
For credit card transactions, enter the credit card number here. The system will check this number against the credit card prefixes defined in the Credit Card Configuration from the main menu. If the reference number begins with a sequence of numbers that is present in the configuration file, the name of the receipt file will display automatically. If a match does not exist, the primary receipt file will be the default. If you have a terminal to swipe the credit card, swipe the card at this field.
Expiration
If this is a credit card payment, enter the expiration data here. If the card was swiped, the expiration date will be filled in. The expiration date will also appear in the comments field on this screen and cannot be changed.
Register
If the defaults register is not the register to which you want to post this payment, click the down arrow to select a different receipt register.
Merchant Code
This is a credit card field. It is pulled from Order Entry>Utilities>Credit Card Set up
Voice Authorization
This selection becomes available after a credit card number is entered. If this selection is checked, then the Approval Code given over the phone can be entered into "Approval Code" field.
Check, Cash, Credit
If the reference number considers this payment as a credit card purchase, the system will automatically fill in the total charge sale in the credit card field. If a match is not found against the credit card file, the system will allow entering the total in any of the three fields. For quick entry, click the Entire button  or the Difference button
  while in these fields to insert the appropriate amount of payment.
Total Paid
This field displays the total of the payment for this order. It may be a combination of Check, Cash, Credit and Discount.
Tendered
This is a running total of all payment amounts entered in the check, cash or credit fields. Override this amount if the customer is paying more than the payment entered and is due change.
Change Due
This field displays the difference between the amount tendered and the amount the customer is paying. If the customer will be due change, enter the actual amounts due in the Check, cash or Card fields. Then edit the tendered field to the actual amount paid. The system will automatically calculate the change due.
Discount
If the "Allow Discount in Payment" System Option is set to "Yes", then discounts may be entered.
Enter the amount of any discount, if needed. Press Alt D to insert the unpaid amount when the amount paid is less than the total due.
Discount Account
The default discount code from the RFMS configuration will appear here. Pressing F8 may change this code. If the account code is not known, leave this field blank and press Enter. A pick list will appear. Highlight the correct code and press Enter to accept.

If applying a discount, disregard this field as the RFMS system automatically posts payments to the correct account code.
Comments
Enter any descriptive information desired if this transaction is not a credit card payment. Credit card transactions will display the expiration date here and may not be changed.
Check Number
This field will only be available if the payment tendered includes a check. This check number will be available for viewing browsing or printing Receipts History or a Receipt Recap Report.
If a credit card payment is not being verified, then a warning message appears.

For the message to appear the following conditions must be met:
- Credit card verification is turned on.
- The selected Receipt Register has a credit card configuration
- There is an amount in the Card
- The reference does not contain a valid card number.
Visa and MasterCard have implemented an Approved Amount feature. This is used in the event that the cardholder tries to charge one amount and is limited to another amount. The amount that will be charged to the card and an explanation will show in RFMS. This will enable the salesperson to explain what happened.

In Claims, only posting a discount is allowed.
Comments
Article is closed for comments.